
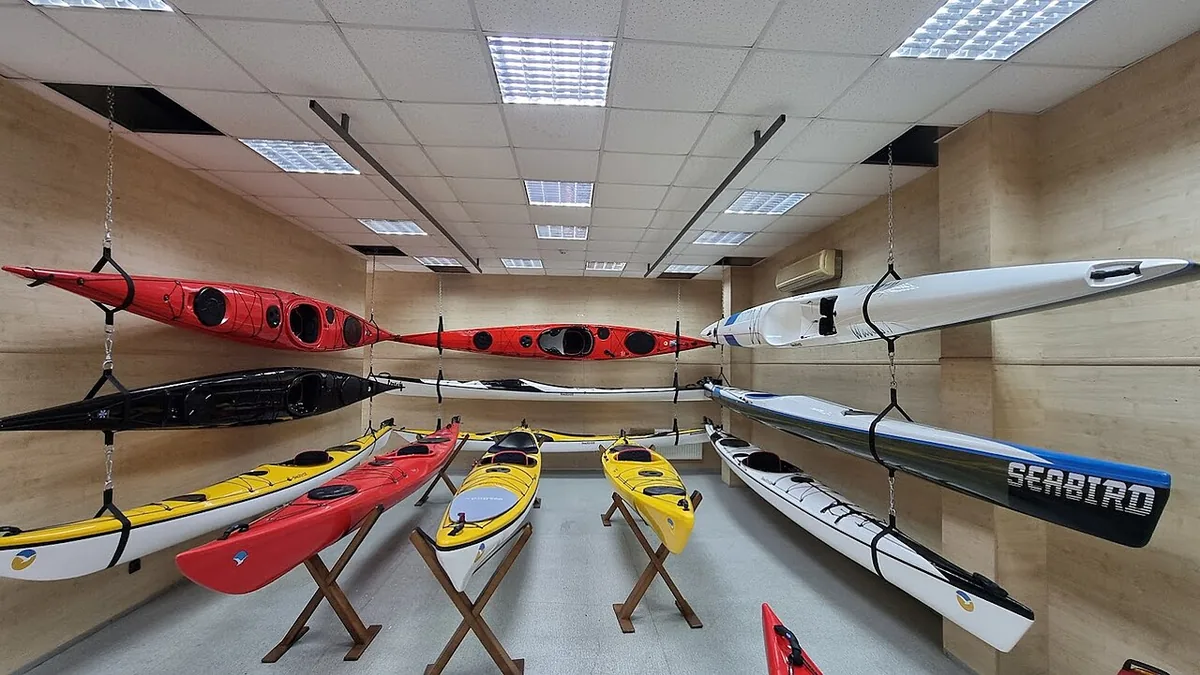
A plastic kayak is tough on the water and surprisingly fragile in storage. Sun, heat, and pressure in the wrong places will warp a hull, fade the colour, and crack fittings — and the damage is usually permanent. The good news is that proper storage is simple and cheap: keep it out of the sun, support it in the right places, and give it a wash and a check twice a year.
The three rules of kayak storage
Out of the sun. UV is the biggest enemy of a plastic kayak. Months in direct sunlight will fade the colour, make the plastic brittle, and weaken the hull. Store the boat indoors if you can. If it must live outside, cover it with a tarp or a kayak cover, and keep the cover off the hull so air can circulate — a tight tarp in the sun turns into an oven.
Supported, not squeezed. A kayak should rest on its side or upside down, supported at two wide points about a third of the way in from each end. Never rest it on a single narrow point for months, and never hang it by its ends — both will deform the hull over time. The deformation has a name, oil-canning, and it is a flat spot or dent in the hull that changes how the boat handles.
Clean and dry. Rinse off mud, sand, and salt after every trip, and let the boat dry before storing it. Trapped moisture grows mould, corrodes metal fittings, and smells terrible in spring. Leave the hatches open or ajar while it dries, and store it with the cockpit facing down or covered so rain and animals stay out.
Indoor storage options
On its side against a wall. The simplest method: lean the kayak on its side against a garage wall, resting on foam blocks or old carpet. The hull’s side is strong and the shape is stable. Put a foam pad under the contact points and check it every few months.
Upside down on sawhorses or a rack. Two padded sawhorses or a wall-mounted rack with wide, padded arms, positioned about a third in from each end. The deck is the strongest part of the boat, so upside down is the safest orientation for long-term storage.
Hanging from the ceiling. A pulley hoist or wide straps (at least 2 inches wide) looped under the hull at two points, about a third in from each end. Wide straps spread the load; narrow rope or a single strap in the middle will dent the hull. A ceiling hoist is the best option for a garage with limited floor space, and it keeps the boat out of the way of cars and tools.
Standing on end. Storing a kayak vertically, nose down, works for short boats in a corner — but only if the nose is on a padded surface and the boat is secured so it cannot fall. Do not store a long boat vertically unless the manufacturer says it is safe; the weight can deform the bow over time.
Outdoor storage
If indoors is not possible, store the kayak upside down on a rack, off the ground, under a cover. Keep it at least a few inches off the ground so rain does not pool underneath and animals cannot nest in it. A cockpit cover (around $20 to $30) keeps out rain, leaves, and spiders — and stops the boat becoming a mosquito breeding pool.
Never store a kayak on the roof of a car for weeks. The heat, the sun, and the pressure of the straps will deform the hull. Take it down after each trip. And never store a kayak directly on concrete in the sun — concrete holds heat and will soften the plastic on the contact patch.
Transport: getting it to the water without damage
Roof racks. The best option is a proper kayak roof rack: J-cradles (the boat sits on its side in a J shape) or saddles (the boat sits hull-down on padded cradles). Both spread the load and hold the boat securely. Foam blocks on the roof bars are the budget option (around $30 to $50) and work fine for short trips, but they grip less well and the boat can shift.
Straps, not rope. Use cam buckle straps, not ratchet straps. Ratchet straps can be overtightened easily and will deform the hull — one firm pull on a cam strap is enough. Run the straps around the boat and the roof bars, and always use bow and stern lines tied to the front and back of the car: they stop the boat lifting in a crosswind and are your backup if a strap fails.
Loading. Lift the boat onto the roof from the side, hull up, and slide it into the cradles. A second person makes this much easier; a towel on the roof edge protects the car and the boat. Lift with your legs, not your back — a 50-pound kayak at shoulder height is a back injury waiting to happen. For solo loading, a load-assist rack or a simple roller on the rear bar helps a lot.
Maintenance: the twice-a-year check
After every trip. Rinse the boat with fresh water, especially after salt water. Open the hatches and drain plugs, sponge out any water, and leave it open to dry. Wipe down the seat and foot braces.
Spring check (before the season). Inspect the hull for cracks, deep scratches, and deformation. Check the hatch covers for cracks and make sure the seals are supple — a dried-out seal leaks. Check the seat, backrest, and foot braces for loose screws. Check the drain plug and scupper holes for blockages. Lubricate the rudder cables if you have a rudder, and check the skeg moves freely.
Autumn check (end of season). Same as the spring check, plus a thorough clean. Apply a UV protectant spray (such as 303 Aerospace Protectant) to the hull — it slows sun damage and keeps the plastic supple. Tighten any loose screws, replace worn bungee cords, and store the boat clean and dry.
Small repairs. Shallow scratches are cosmetic and can be left alone. A small crack or hole in a polyethylene hull can be repaired with a plastic welding kit (around $30) or by a kayak shop. Do not use epoxy or fibreglass resin on a polyethylene boat — it will not bond. If the hull is cracked through at a stress point, have a professional look at it before your next trip.
How long does a kayak last?
A well-stored polyethylene kayak lasts 10 to 15 years or more. A poorly stored one — left in the sun on a roof rack for summers at a time — can be warped and brittle in three. The difference is almost entirely storage, not use. The hours on the water do not wear a kayak out; the months in the sun do.
Store it inside, upside down or on its side, supported at two wide points, clean and dry, and it will still be a good boat when you are ready for a longer one.